The Styling Guide: Perfectly Styled Shelves
August 16, 2022
Whether you are finishing a full remodel or giving your home a quick refresh, perfectly styled shelves are essential to making your home feel complete. Styling shelves is all about balance, creating dimension and incorporating those personal touches. Whether you like a more full, accessorized look or a clean, minimal look, our styling guide will take your shelves to the next level.
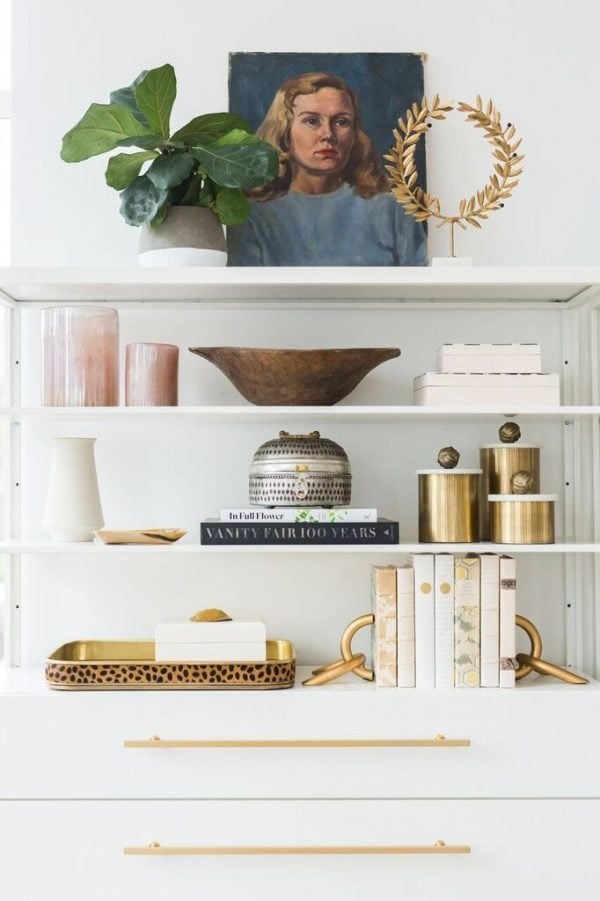
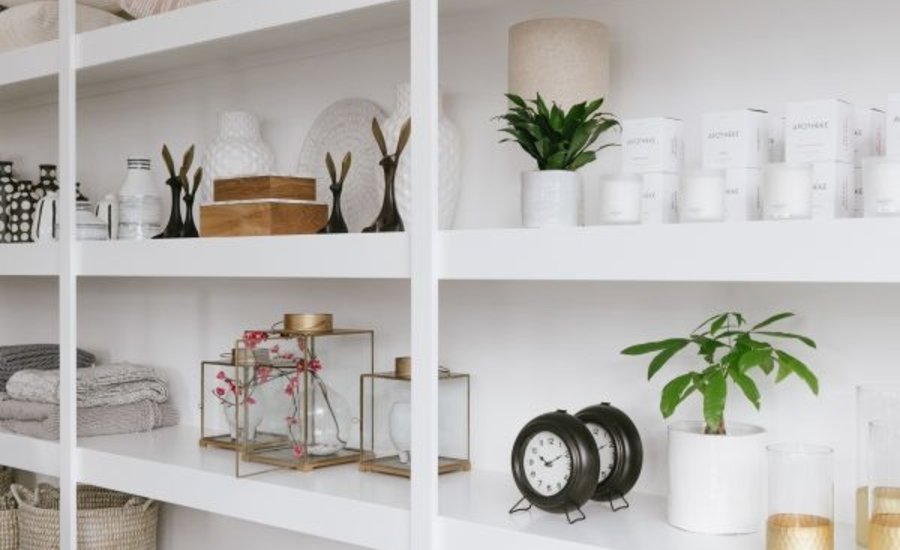
Image via Studio McGee
Shelves can be an intimidating place to style. The key to curating your perfect shelf display is not being afraid to make mistakes! Be ready to move things around, try a totally new arrangement, take risks or even start over! Its all part of the process, even our seasoned interior designers go through several iterations before they reach a perfectly balanced and curated end-result. Here are our tried and true steps to achieve perfectly styled shelves:
BEGIN WITH A BLANK SLATE
Clear everything off your surfaces and wipe them down before layering on objects. Starting with a blank slate is key to refreshing any space. This tip will allow you to see your space in a fresh, new light. You might consider leaving your shelves empty for a day or two. This step will give your brain time to forget what it looked like originally. Sometimes our memory of how things were can cloud our creativity when trying to come up with a brand new arrangement.
GATHER YOUR STYLING ITEMS
Set out all of your the decor and accessories that you may want to display. The more options you have, the better. Keep in mind that you don’t have to use everything! You can always save items and switch them in/out when you feel like a refresh. Gather a wide array of items like books, frames, bowls, sculptures, clocks, vases, pots, candles, baskets, trays, boxes, bookends, beads and art. Seeing all your decor gathered in one place will allow you to start drawing connections between things that go well together.
Did you find gaps in your accessory inventory? Stop by The Phinery Home Store to collect decor and accessories to complete your styling project!
START STYLING!
Begin grouping objects to create small vignettes that include a variety of sizes and materials. Variation is key to achieving that effortless, un-staged look. Try a tall vase on one side of your shelf and layer a small figurine in front. Try a shorter, wider potted plant on the other side of the shelf. Experiment with stacking a few books in the center of a shelf and placing a smaller item on top. Try leaning a small piece of artwork or photo over a larger piece to create dimension. Knowing where to start can seem intimidating, but it doesn’t really matter where you start, just that you try a few different combinations. Once you see things arranged on your shelf, you’ll know what you do and don’t like. As you work on putting vignettes together, make sure to follow these tips:
TIP #1 : NOTICE SIZE, COLOR & TEXTURE
When selecting items to display on your shelves, make sure you have a wide variety of sizes, colors and textures (this is super important for Tip #2 and #3). We like to stick with a mainly neutral palette, with small, understated pops of color. Greenery via plants or faux botanicals is our favorite way to add both color and texture to a space. Ideally, you can collect these items over time to create a personal collection that shows off your style and personality. Don’t be afraid to mix materials! Metals, natural stone, wood and glass items can all contribute to a cohesive look.
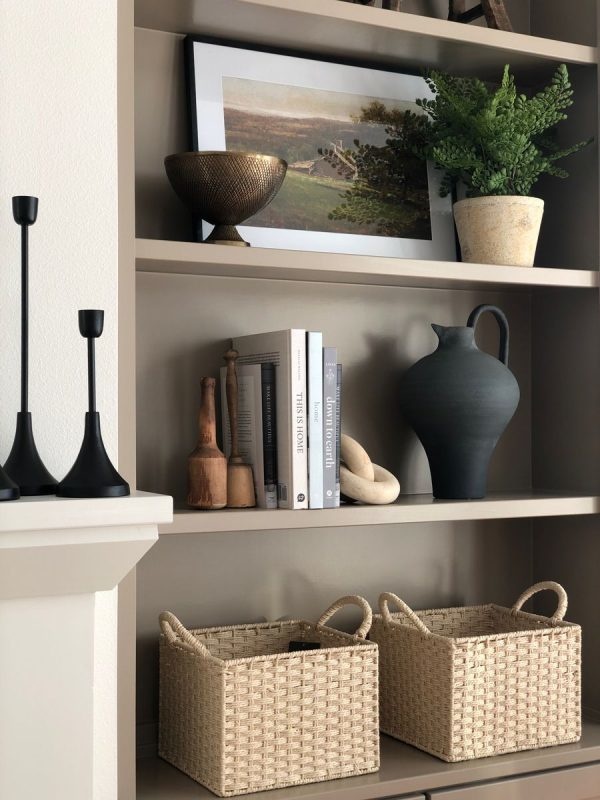
Image via Ann Marie & Co.
TIP #2 : PLAY WITH HEIGHT AND PROPORTION
In order for you shelves to appear full, you’ll want to display a variety of items with different heights and proportions. Our eyes naturally look for inconsistencies in patterns, so varying height, depth and width (instead of lining items up that are all the same height) will allow your eye to move up and down the shelves without finding something that ‘sticks out’. Creating consistent inconsistency is the key! We recommend creating height with a tall vase, pitcher or taper candle holders. Stacking books to elevate smaller objects is another way to create height or elevate objects that are appearing too short. It is important to incorporate a low, elongated bowl or a long, low sculpture to contrast against tall, slender shapes like vases, hurricanes and candles. Stacking boxes is another great tactic for creating height and width.

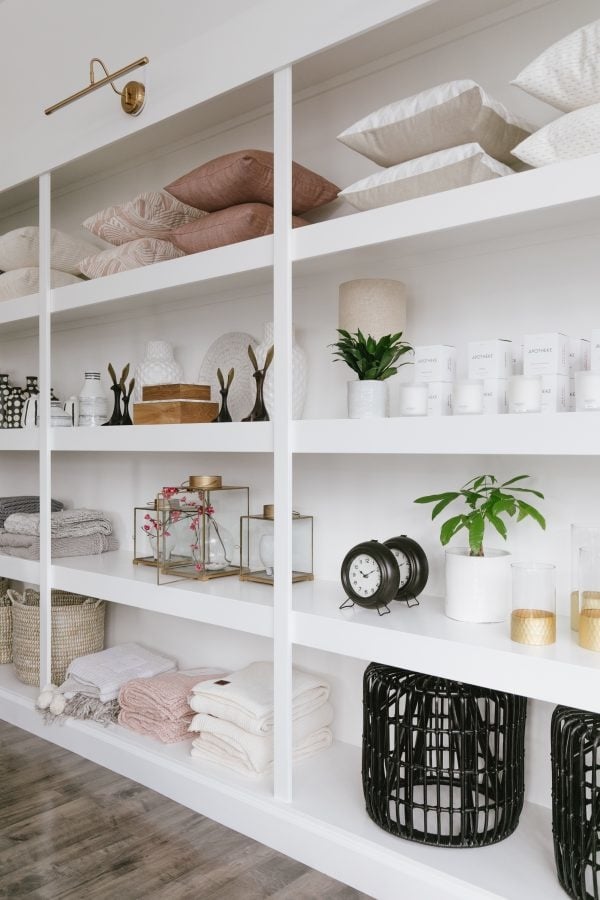
Image via Karin & Co.
TIP #3 : ITS ALL ABOUT BALANCE!
Creating balance on your shelves might be our most important tip! Your shelves will never look quite right without colors, heights and textures feeling balanced. Make sure to always consider the visual weight of your objects. Factors that play into visual weight are: size, proportion, depth of color, weight of texture or pattern, or number of items in a grouping.
Create balance within one shelf by varying visual weight between each side. For example, layer a trio of smaller items on one side and a single, larger item on the other side of your shelf. Avoid using uniform sized items all on the same shelf. Create balance between multiple shelves by balancing visual weight diagonally (see photo below). You will notice that the warm wood/rattan color switches which side of the shelf it appears on, or it sits in the middle.
Not all items of the same color are staged on the same shelf. You’ll also notice that tall/large items are often paired with items of a completed different shape and size from side to side and from top to bottom. Round, slender vases are paired with a square photograph, and sit beneath square books. A large wood bowl sits next to a small stack of white items and sits above a short potted plant. Varying the visual weight of the objects on your shelves will help you achieve that beautifully styled, yet personal look.

Image via Love Grows Wild
We hope you take these tips and have fun creating styled shelves that reflect your personality and style! If you think you might need one-on-one help with styling or designing your interior space, book a consultation with one of our Seattle interior designers!